12/12/2015

How to cut a pineapple in 30 seconds!


How to cut a pineapple in 30 seconds!


The pineapple are used in salad or in savory dishes, also in pizza toppings (but not in Italy :-) ) and a grilled ring on a hamburger.
The pineapple is used in yogurt, jam, cake and ice cream.
The juice of the pineapple is served as a beverage, and in cocktails such as the pina colada.
Pay attention: A pineapple's core is hard, and not as sweet as the rest of the pineapple, so we usually don't want to eat it, but it is also rich of nutritious as the bromelain so we can't cut it :-)

Follow me on fb: https://www.facebook.com/Eat-Healthy-and-run-536617906489942/?ref=hl

11/12/2015

HEALTHY AND EASY FALL SALAD

Vegetarian salad
We are what we eat! Everything we eat and drink directly affects our cells. We know that two-thirds of our plate should be vegetables and fruit, with the remaining one-third covered by lean protein (lentils, beans, chicken, fish) and whole grains.
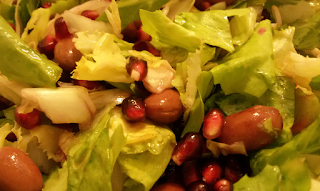
Autumn has arrived in Italy but at the same time, the heat of this strange November makes me abandon the soups for fresh salads. I love salad and this is my Autumn Salad.

Ingredients:
  • a lettuce
  • 1 cup of pinto beans (borlotti)
  • 2 pomegranates
  • 10 walnuts
  • cider vinegar
  • extra virgin olive oil
  • toasted wholemeal bread
  • paprika, curcuma and pepper
This recipe is really easy, just shelling the pomegranate and on my facebook page you can find a post where you see how to do it easily https://www.facebook.com/ciboformafisicasalute/?ref=hl , add pinto beans, nuts and cider vinegar, extra virgin olive oil, spices and serve with toasted wholemeal bread.
Enjoy your meal!


For beans
Soak the beans the night before (for at least 12 hours, remember that pre-soaking is really important), cover beans with about three inches of water and pay attention because beans do “drink” the water. then you cook them in pressure cooker (cooking time depend on what kind of bean and what kind of pressure cooker you have), usually 40 minutes.


Try my new recipe: roman gnocchi

11/03/2015

Roman Gnocchi Light


Roman Gnocchi Light
Roman Gnocchi Light

ROMAN GNOCCHI LIGHT


This is a simple recipe, it’s inexpensive but really good! My daughter loves these gnocchi! This is much lighter than classical recipe, in fact the classical have butter, eggs and too much cheese. Gnocchi alla Romana is a typical italian recipe, from Rome (the capital of Italy). This dish can be prepared in advance so it’s easy and quick. Roman Gnocchi are tender inside with a thin crunchy crust.

Ingredients:
  • 2 cups (250 gr.) semolina flour
  • 4 1/2 cups (1 lt.) water
  • 2 tablespoons extra virgin olive oil
  • salt
  • 2 oz. (50 gr.) parmesan cheese freshly grated
Method:

in a heavy bottomed saucepan, bring the water to a lightly simmer, then add salt and semolina flour then stir with a whisk to avoid lumps.
Cook for at least 5 minutes. The mixture should be like some mashed potatoes. Remove from heat add olive oil and 1 oz. parmesan and stir until all is well mixed.
Put the dough over a baking paper and roll to about 0.50 inches (1 cm).
Cut the dough in circles, I used a coffee cup with edges oiled with some extra virgin olive oil. If you choose, like me, the classic form you can re-knead what is left and roll out again to make other gnocchi.
Put a baking paper or oil into baking pan, add gnocchi and sprinkle some Parmesan, pour some oil on. Preheat the oven to 350/400°F gas 4 and bake about 30 minutes.
10/30/2015

Pumpkin seeds snack

Jack O' Lantern


Fall is the pumpkin season! Carving your own Halloween pumpkin is an easy and fun activity for the whole family, but what to do with the leftovers… Do you Know that pumpkin seeds are an excellent source of magnesium and also supply some protein and fiber? The seeds are rich in phytosterols, natural plant compounds that may help lower blood cholesterol levels. So don’t throw out your pumpkin seeds! Believe it or not, the seeds you exhume and discard from your soon-to-be Jack O’ Lantern are just a quick roast away from becoming a delicious snack – crunchy.
Ingredients:
  • one pumpkin
  • 1/2 teaspoon cumin
  • 1/2 teaspoon paprika
Method:
Cut open the pumpkin by cutting a circle around the stem end with a knife and pulling off the top. Scrape the seeds from your pumpkin with a metal spoon. Place the mass of pumpkin seeds in a colander and run under water to rinse and separate the seeds from flesh. Preheat the oven to 350/400°F gas 4. Spread the pumpkin seeds evenly over a large baking tray. Put a few good lugs of olive oil over the seeds and mix together with cumin and paprika. Bake until the seeds begin to brown, 10 minutes, depending on the size of the seeds. Let the pumpkin seeds cool all the way down before eating. Either crack to remove the inner seed and eat. You can use

10/24/2015

Pesto Sauce Recipe


Pesto sauce in ten minutes
Pesto Sauce
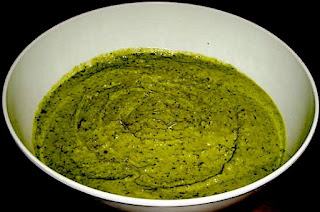
Make your pesto sauce in ten minutes! It's the best choice for your pasta! Do you Know that there is a championship in Genoa. Do you want to partecipate? Read more: The Genoa Pesto World Championship
  • 4 bunches of fresh PDO (Protected Designation of Origin) Genoese basil
  • 30 g pine nuts
  • 45-60 g aged Parmesan cheese, grated
  • 20 g Sardo cheese (Pecorino Sardo), grated
  • 1-2 garlic cloves from Vassalico (Imperia)
  • 5-6 g salt
  • 70 cc PDO extra-virgin olive oil from the “Italian Riviera”
Wash the basil leaves in cold water and dry them on a tea towel but don’t rub them. Then in a mixer insert the garlic and pine nuts. Add salt and the basil leave, then add the Parmesan cheese and the Sardo cheese mix with a spoon. Pour in a thin layer of PDO extra-virgin olive oil from the Italian Riviera, which lightly blends the ingredients without overdoing. The preparation must be done as quickly as possible to avoid oxidation problems.
Pesto sauce should be stored in the refrigerator for four to five days at the most, covered with a thin layer of oil. You can also store it in your freezer for one to two months. Remember to divide it into the portions you use to toss pasta

Hummus

Alimentazione e salute
Hummus
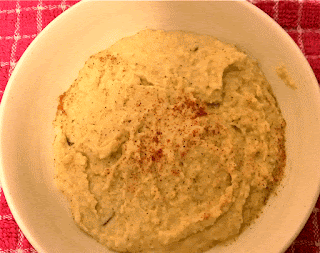
Today my proposal is hummus recipe.
This sauce is great to make sandwiches for your lunchbox, or simply to eat with warm pita bread or piadina or to make a vegetarian stuffed courgettes.
This recipe is so quick and easy.


Ingredients:
  • 7 oz chickpeas (save the cooking liquid), or canned chickpeas
  • 2 garlic cloves
  • 2 tablespoons lemon juice
  • 2 tablespoons extra virgin olive oil
  • 2 tablespoon tahini (it's a paste made from ground sesame seeds) optional
  • 1 teaspoon paprika
  • 1 teaspoon ground cumin
  • 1 teaspoon salt
Preparation method:

The night before soak the chickpeas in plenty of cold water. The day after you can cook them for 40 minutes in the pressure cooker.
Then all you have to do is throw all the ingredients in the processor.
And... your homemade hummus is ready!

Vegetarian Stuffed Courgettes

Vegetarian Stuffed Courgettes

Stuffed courgettes is a very tasty main dish, well known among classic Italian Recipes but today I propose you a vegetarian recipe.
This recipe is even more interesting because you will use the whole courgette: its pulp for example will be added to the hummus to enrich the filling.

Ingredients for 3 people

  • 8 courgettes
  • hummus
  • wholemeal bread crumbs

Preparation of vegetarian stuffed courgettes

Wash the courgettes. Even if there’s no visible dirt you should always wash them under fresh running water to rinse them of any pesticides or lingering bacteria. With your hand, gently rub the skin of the zucchini while holding it under water until it no longer feels gritty.
Trim off the ends and boil the courgettes whole in lightly salted water for at least 5/10 minutes, until soft. Cut the courgettes in half lengthwise, and scoop out the pulp in a bowl and keep aside. Mix together hummus and pulp. You can now lay your hollow courgettes on an oiled baking tray and fill the vegetables with the mix.
Run a fork on each courgette lengthwise in order to get a ridged surface and sprinkle with wholemeal bread crumbs.
Cook for 20-30 minutes at 180ºC and leave them too cool down for 5 minutes before serving.

Notes:
the stuffed courgettes are a perfect dish for summer (you can find the last courgettes in a market), to prepare well in advance to eat the day after!
In my family, filled courgettes were a very popular dish and an easy one to make with kids. It’s also a good way to get children to eat vegetables.
Et voilà vegetarian stuffed courgettes

Whole-Wheat Penne with Green Beans

Whole-Wheat Penne with Green Beans

Why Is Whole-Grain Pasta Healthier Than White Pasta?
The seeds of whole grains have three components called the endosperm, germ and bran. When these are intact, whole grains offer you higher nutrient value. We know that the carbs are a nutrient that our body needs. They function to give you energy and support the brain and nervous system. Simple carbs occur naturally in milk, milk derivatives and fruits, but they are also prominent in cakes, cookies, candy, sweet drinks and sugary cereals. When consumed, simple carbs give you a fast spike of energy, but it wears off quickly. White pasta is technically a complex carb, but it is refined and starchy. This makes it act like a simple carb in the body. Consistent intake of simple carbs can promote weight gain and hinder weight loss efforts. Complex carbs, on the other hand, are digested at a slow pace and give you lasting energy levels. Whole-grain pasta is a good source of complex carbs.
ACS Guidelines for Nutrition recommend: “Choose whole-grain breads, pasta, and cereals (such as barley and oats) instead of breads, cereals, and pasta made from refined grains, and brown rice instead of white rice”.
So if you spend extra money on whole wheat bread or pasta and you’re positive you’ll enjoy a low glycemic index, nutritional fibers, and generally better health.
Ingredients:
  • 8 oz. whole wheat penne or spaghetti
  • 2 to 3 tablespoons pesto sauce the original recipe
  • 1 lb green beans, ends trimmed
  • 1 yellow onion
  • 2 tablespoons of oil
  • salt
Method:
Cut the green beans are into one-inch pieces.
Cut the onion into thin slices, in a large, heavy skillet, warm the olive oil over medium-high heat and then add the onion and sauté for 4 minutes. Add the green beans, salt, the reserved pasta cooking liquid and continue cooking until the beans are tender.
Drain the pasta and immediately toss it in a large bowl with the green beans, pesto.
Bring the bowl to the table and serve

Homemade Mustard Recipe

Mustard
Homemade Mustard Recipe
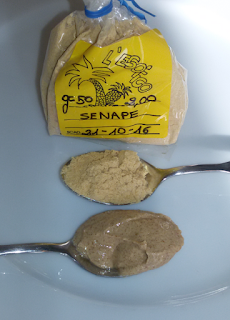
Have you ever read the ingredients list on a mustard? Quite possibly not. For example these are the ingredients of a famous mustard: water, mustard seeds, vinegar, salt, citric acid, sulphur dioxide
I hope I have convinced you to leave the jar on the shelf of the supermarket, also because it is really, really easy to make.
Mustard is a condiment of a thousand faces. Vinegar is often used, but also wine, beer, water are used to moisten the seeds. Sweetness is usually achieved by adding honey.
Grind some mustard seeds, mix with mustard powder and some liquid and you’re done. Endless variations exist. Change the liquid and you change the mustard. Grind the mustard seeds a lot or a little and you change the texture — or skip the whole seeds altogether and use just mustard powder. Or skip the powder and just use seeds.
I use only mustard powder and this is my recipe, try it!

Ingredients (servings: 1)

  • 1 tablespoon of mustard powder
  • 1 teaspoon of apple cider vinegar
  • 1 teaspoon of water
  • 1/2 teaspoon of honey
  • 1 teaspoon of vegetal oil
  • pinch of salt
Put and mix all ingrendients in a cup. Put into a glass jar and store in the fridge. Wait at least 12 hours before using.
Your mustard is ready!
How to store: Seeds can be stored up to a year in a dry, dark place; and powdered mustard for about six months. The mustard will keep for up to 6 months refrigerated

Chips without Potatoes

Oven-chips without Potatoes
This is my proposal of chips, a delicious and healthy low fat recipe, that can be made from chickpea flour, and embellished with flavours of your own choosing. This is a gluten free recipe. This is an old Ligurian recipe: its name is “Panissa”. You need chickpea flour; if needed, you can make it at home, by grinding dry chickpeas to a powder in either an electric coffee grinder or a blender.
Total preparation and cooking time: about 2 hours. But you can eat these “chips” into your salad or warm chip with crème fraîche, a small slice of smoked salmon, smoked trout, or a bit of caviar.

Ingredients:
  • 2 cups of chickpea flour
  • 4 cups of water
  • salt and pepper
Put the chickpea flour and salt in a pot and slowly add the lukewarm water. Stir your batter until the dry and wet ingredients are well incorporated, beat with an electric hand mixer or whisk. Bring over medium high heat and make it boil.
Reduce heat and cook for 50 minutes, stirring constantly; should it dry out too much while it’s cooking stir in more boiling water. If you have a polenta pot with a mechanical stirrer, the cooking will be much easier.
Then put it in a greased pyrex and let the Panissa cool. Then cut it into matchsticks (1/8-inch thick). Spread the chips evenly on a baking tray (use more than one if you need to – best not to have the chips piled up on top of each other) and stick them in a hot oven (200c) for 20/25 minutes or so.They should be light brown and starting to get crunchy. After 20 mins or so, they should be done.
Serve hot, with sauces if you like (provided they are healthy), and enjoy! These chips go well with loads of dishes, also in salad and in sandwiches.

Whole-Wheat trofie with pesto step by step


Alimentazione e salute
Whole-Wheat Trofie with pesto

In weekend I love cooking with my daughter. Cooking with kids is also a great way to give them a lot of information about food, diet and healthy eating. This saturday we cooked together trofie (or trofiette). Trofie is a typical regional pasta of the Liguria (Liguria is Italy’s northwestern coastal region). Trofie are twisted to look like spirals with thinner ends compared to the center. The dough for this pasta is made with flour, water and salt, I used the whole-wheat flour because is better than flour 00. As tradition requires, the Trofie are usually seasoned with delicious pesto sauce made with Genovese basil, pine nuts and Parmesan cheese. Obviously are suitable for many other recipes.

Ingredients: (Servers: 3)

  • 2 cups of whole-wheat flour
  • 1/3 cups of water (the amount of water used depends on the type of your flour, so you might have to add a little more or less to get the consistency of the dough right)
  • 1 teaspoon of salt
Place the flour and salt in a bowl and add the water. Using the tips of your fingers, mix the water with the flour, incorporating a little at a time, until everything is combined. You can also make your dough in a food processor if you’ve got one. Once the dough is a cohesive mass, continue to knead for another 15 minutes, remembering to dust your board with flour when necessary. At the end the dough should be elastic, smooth and silky.

Alimentazione e salute
Dough
Then wrap the dough in cling film and put it into the fridge to rest for at least 20 minutes before you use it. Then you have to roll small pieces of dough. Dust your work surface with the flour, and take a lump of dough the size of a chestnut and start kneading the dough with both hands, primarily using the palms of your hands.
You have to obtain strings of dough until the width of the rod is about 1/2-inch  just like these:

Strings of Dough


Then you have to cut each string into small bits and shape each with your fingertips in a single rolling movement. Dust with flour to avoid trofie sticking one another.

Cook the pasta in boiling salted water, simmer for 3 minutes for an authentic ‘al dente’ texture.
Drain and serve with pesto sauce or with your favourite sauce.

Beef Stuffed Courgettes and Onions

 
Beef Stuffed Courgettes and Onions

Today I propose a traditional italian dish. Italian cuisine follows the Mediterranean pattern of eating and uses on simple, natural ingredients, making it one of the world’s healthiest diets. The benefits of a Mediterranean style eating pattern may include improved weight loss, better control of blood-glucose levels.
In my family, beef stuffed courgettes and onions were a very popular dish and an easy one to make with kids. It’s also a good way to get children to eat vegetables and meat.

Ingredients (serves: 3)

  • 3 medium courgettes
  • 3 medium sweet onions
  • 10 oz. minced beef
  • 1 slices of dry whole grain sandwich bread
  • 1 oz. grated Parmesan cheese
  • 2 teaspoons salt
  • 1 egg, beaten
  • 1 oz. wholemeal bread crumbs
  • oil
Method
Wash courgettes (do not remove ends) and wash the onions.
Boil the courgettes and the onions in lightly salted water for at least 5/10 minutes until they feel slightly soft when pressed with a fork. Then cut the courgettes in half lengthways, remove ends and scoop out the flesh with a teaspoon. Slice tops off of onions and remove centers of onions. Put their pulp in a bowl and keep aside. Then mix together courgettes flesh, the center of onions, beef, Parmesan cheese, salt, egg and add bread slice just tear up into fine pieces.
If the mixture is too soft, add a bit more of the wholemeal breadcrumbs.
You can now lay your hollow courgettes and onions on an oiled baking tray and fill the vegetables with the mix.
Run a fork on each courgette lengthwise in order to get a ridged surface and sprinkle with wholemeal bread crumbs.
Cook for 30/40 minutes at 180ºC (350 degrees F, 4 gas number, moderate: oven terms.

Note:
the stuffed courgettes are a perfect to prepare well in advance to eat the day after!
Beef stuffed courgettes and onions can be made up to the “ready to bake” stage and frozen for later meals.
You can use packaged breadcrumbs but if you have a food processor, put bread slices to a processor and pulse to make breadcrumbs.

Whole Wheat Piadina

Whole-Wheat Piadina

In the fall and winter my favorite family routine is our Saturday movie nights or game nights with board games. We also have (homemade) pizza for dinner or piadina.
You know pizza and you know espresso, but do you know “piadina”?
Piadina is a flat bread from the Italian region Emilia Romagna particularly in a town called Riccione.
Piadina can seems similar a tortillas or tacos but it’s very different. These delicious sandwich wraps are filled with everything: cheese, ham, vegetable, pesto or jam, nutella .
I chose to fill mine with green beans, prosciutto and cheese but I believe that increasing your vegetable consumption is one of the best things you can do for your health.
The real piadina isn’t too healthy so this is an alternative healthy recipe
This recipe is fast, easy and great tasting.
What are your favorite piada fillings?

Ingredients (makes 3 large piadine)
  • 2 cups whole wheat flour
  • 6 oz. water
  • 1 teaspoon salt
  • 2 tablespoon extra virgin olive oil
  • ½ teaspoon baking powder
In a bowl mix the ingredients in this order: flour, baking powder, salt, water, and oil. Stirring well between each item. Knead the dough for 5 – 8 minutes, until it forms a soft and elastic ball. You may need to add a bit of flour depending on the flour you are using. You can knead the dough in a standing mixer on low speed until combined.
Place ball of dough into a floured bowl. Cover bowl with moist dish cloth or plastic wrap. Let rise for 30 minutes in a warm area.
Cut into 3 equal portions. Roll each portion out onto a lightly floured surface until less than ¼ inch.
Cook the dough in a lightly oiled hot skillet until it begins to set, 2 minutes per side. Remember you will kow piadina is ready to turn when top side is covered wint bubbies. Remove from the pan and add your favourite ingredients.

Notes:
Piadina can also be cooked on an outdoor grill in the same way

Whole Wheat Bread for Sandwiches


Flour, yeast, water and salt, a traditional loaf needs only four ingredients. So why are calcium propionate, amylase, chlorine dioxide and L-cysteine hydrochloride now crammed into our daily bread?
Over the last year, I’ve gradually moved more towards making my own food at home. There are several reasons for this, for example: it tastes better, it reduces preservative intake, it’s more nutritious, and it’s cheaper. It does take time, but once you get used to it, most food preparation doesn’t take much more time than going to the store, buying it, taking it home.
In the industrial breadmaking is the appearance of a healthy dose of preservatives. These preservatives are there solely to extend the shelf life of the bread, again reducing costs for the manufacturer. Every time you eat a piece of store-purchased bread, you’re getting a dose of preservatives with each bite.
This is my recipe for a whole wheat bread for sandwiches

Ingrendients:

  • 500g Whole Wheat flour (3 cups + 1/3 cup)
  • 330g water (1 cup + 1/2)
  • 1 teaspoon salt
  • 6g fresh yeast or 1 package active dry yeast (you can get yeast near the flour at your local grocery store)
  • 3 tablespoons of extra virgin olive oil
Dissolve the yeast in a little of water by stirring it gently with your fingers. You should stir this until there are no lumps in the yeast. Pour the yeasty water into the bowl with the flour and salt and add the rest of the water. Use one hand to hold the bowl and the other to begin mixing the dough (you could use a wooden spoon but it’s just another thing to wash up, and hands are more effective). Knead until to the flour will absorb the water and the gluten structure should begin to develop. Then grab the dough ball out of the bowl, slap it down on the table, and start beating on it. Do this for ten minutes. Just take the dough, punch it flat, then fold it back up into a ball again, and repeat several times and knead for 10-15 minutes. If you are using a mixer, rather less time will be needed. At the end the dough should be soft, slightly silky to the touch and elasticity.
Put the dough on to the worktop and roll it into a sausage and place it in a grease PlumCake tin. The roll should be roughly the same size as the bread pan. Set your bread to prove in a warm place, covered with a cloth over the bowl (I put it in the oven off) for two hours.
Put that loaf in the oven at 400 degrees Fahrenheit (200 degrees Celsius) for 30/40 minutes. When it’s done, pull it out and immediately remove it from the pan to cool.
Let it cool down completely before slicing.